Controlling LED using ESP8266 and Telegram Bot – IoT Project
In this project we will control an LED which is connected to ESP8266 with a Telegram bot. Hope you know about Telegram, it is a messenger app similar to Whatsapp. This enables users to control their ESP8266 via simply typing and sending commands in Telegram. By adding some relays or TRIAC you can make this a home automation project.
Components Required
- ESP8266
- LED
- 470Ω Resistor
- Breadboard
- USB Cable
- Connecting Wires
Hardware
Circuit Diagram
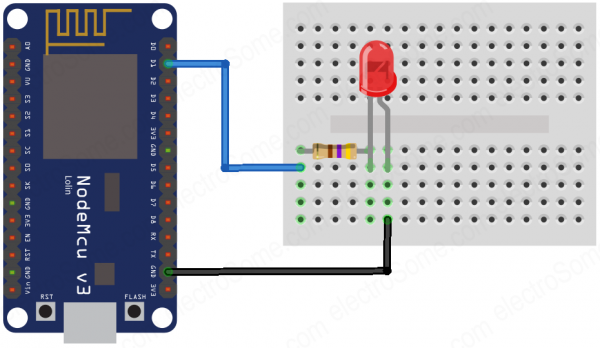
Software
Telegram Bot
Bots are third-party applications that run inside Telegram. Users can interact with bots by sending messages, commands and inline requests. We can control our bots through HTTP APIs provided by Telegram.
A Telegram bot is an application hosted on a server (here it is ESP8266) that uses Telegram bot API to connect to Telegram Messenger clients. A great advantage of Telegram bots is that they have zero install requirements and run seamlessly on all computer or mobile platforms where Telegram Messenger runs.
Configure Telegram Bot
Install Telegram on your Laptop or Phone and search for BotFather. Through BotFather we can create a new bot. After creating a new bot, we have to note down the token which is the interaction key between device and Telegram bot API .

Telegram Bot Library for Arduino
- Download the Telegram Bot library.
- Open Arduino IDE, Go to “Sketch”, Select “Include Library” and Click on “Add .ZIP Library”.
Programming ESP8266
#include <ESP8266WiFi.h>
#include <WiFiClientSecure.h>
#include <TelegramBot.h>

#define LED 5

const char* ssid = "<Your WiFi Name or SSID>";
const char* password = "<Your WiFi Password>";

const char BotToken[] = "<Token you get while creating the bot>";

WiFiClientSecure net_ssl;
TelegramBot bot (BotToken, net_ssl);

void setup()
{
  Serial.begin(115200);
  while (!Serial) {} //Start running when the serial is open
  delay(3000);
  Serial.print("Connecting WiFi.");
  Serial.println(ssid);
  while (WiFi.begin(ssid, password) != WL_CONNECTED)
  {
    Serial.print(".");
    delay(500);
  }
  Serial.println("");
  Serial.println("WiFi connected");
  bot.begin();
  pinMode(LED, OUTPUT);
}
void loop()
{
  message m = bot.getUpdates(); // Read new messages
  if (m.text.equals("on"))
  {
    digitalWrite(LED, 1);
    bot.sendMessage(m.chat_id, "LED is ON");
    Serial.println("LED is ON");
  }
  else if (m.text.equals("off"))
  {
    digitalWrite(LED, 0);
    bot.sendMessage(m.chat_id, "LED is OFF");
    Serial.println("LED is OFF");
  }
}
Working
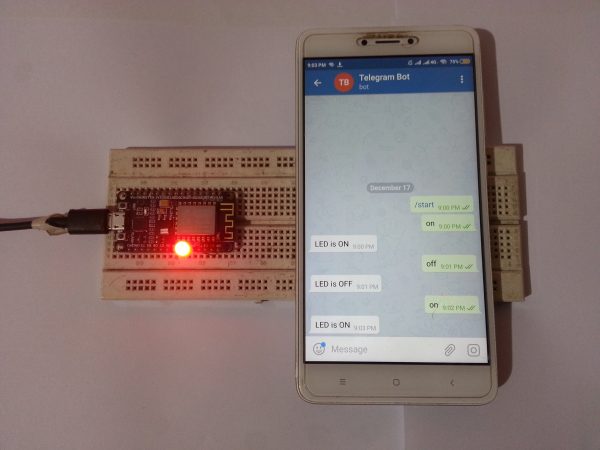
The LED connected to ESP8266 will be controlled by Telegram Bot. In Telegram app, create a new bot and open it. Initiate the operation by sending “/start” message. Send “on” message will turn ON the LED, as a reply we will get information about LED status like “LED is OFF”. Send “off” message to turn OFF the LED, as a reply we will get information about LED status like “LED is OFF”.
Practical Implementation
Comments